Upgrading from old, drafty windows to modern, energy-efficient alternatives is a smart move to enhance your home’s efficiency and overall comfort, not to mention its curb appeal. When it’s time to replace your windows, precision is key. Accurately measuring your existing window openings will ensure that your replacements are a perfect fit.
This guide will walk you through the best practices on how to measure for replacement windows, complete with expert tips for ensuring smooth, hassle-free window replacement.
Why It’s Essential to Know How to Measure for Replacement Windows
Understanding how to measure windows for replacement is an important step. Ultimately, it will optimize the performance of your replacement windows and help you avoid costly mistakes. Inaccurate window measurements can lead to:
- Poor fit, alignment, or functionality of your replacement window components
- Revisions that can disrupt your project’s timeline and impact your budget
- Safety hazards resulting from faulty structures
Accurate measurements will help mitigate these risks and ensure ideal results. Having your exact window measurements on hand will also make your shopping experience easier. Whether you’re browsing in-store or planning a project with a professional, installers will be able to provide you with an accurate estimate for your project.
What Are the Parts of a Window Frame?
Before diving into the how-to of measuring windows, let’s take a moment to brush up on window anatomy. Knowing the basics will help you avoid confusion and streamline your replacement window shopping.
A window frame is the enclosure that surrounds and supports the entire window system, while providing structural integrity to the wall opening. Each part of the frame plays a distinct role in contributing to a window’s efficiency.
Head
The head, situated at the topmost horizontal part of the window frame, attaches the upper edge of the window assembly to the surrounding wall. It often includes decorative features on the interior or exterior.
Jambs
The vertical pieces flanking both sides of the window frame are the jambs. They provide structural support and keep the window panes firmly in place. Jambs contain tracks or rails that enable the windows to open by sliding vertically or horizontally. They’re also where the locks or latches of the windows typically go.
Sill
The sill is a horizontal, shelf-like component located at the window’s base. Comprising a flat surface and a decorative apron, it connects the underlying portion of a window to the surrounding wall. Sills provide structural integrity, water protection, and energy efficiency, and can also serve as a decorative space for plants and other items.
Note: The interior sill is called the “stool,” though the two are used interchangeably. When consulting with window professionals, remember to make this distinction.
Apron
Situated immediately beneath the sill’s shelf, the apron is a decorative trim that enhances the window’s interior appearance. An apron not only adds detail, but also conceals the gap between the wall and the window framework.
Weep Holes
These are small rectangular openings located at the bottom of a window’s exterior frame. Weep holes drain rain water and condensation from inside the frame, safeguarding against potential water damage.

How to Measure Window Size for Replacement
So, how are windows measured? Learning how to measure for replacement windows is pretty straightforward, but having a few essential supplies on hand can make the task even easier:
- Measuring tape
- Notebook
- Pencil
- Highlighter
- Calculator
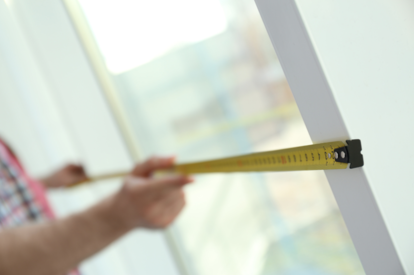
While measuring windows can be accomplished solo, enlisting a helper will expedite the task, allowing one to take measurements while the other simultaneously records them. For larger windows, they can help by holding down one side of the measuring tape, ensuring accuracy and efficiency.
Record your measurements in a notebook, as opposed to a loose sheet of paper that can easily be misplaced, and remember to keep it handy as you contact companies for price quotes to install replacement windows.
Determining if Your Windows are Square, Level, and Plumb
Before you begin measuring, you’ll need to check if your current windows are square, level, and plumb. Square means there’s a 90-degree angle at each corner. Here’s how to check:
- Position your tape measure in the upper right corner of the window and extend it diagonally to the bottom left corner where the vertical and horizontal trims meet.
- Record this measurement.
- Repeat the process and measure from the top left corner to the bottom right.
- Compare the two measurements. If they are within 1/4 inch of each other, a standard replacement window will fit securely in the window opening. If not, you’ll have to replace your window frame or opt for a new construction window instead.
Additionally, you’ll need to check if your windows are plumb (vertically straight), and level (horizontally straight). Place a level against the jamb’s face and check if the bubble sits in between the two indicator lines. If so, the window is plumb. To confirm if a window is level, place the level on the sill. If the bubble falls between the two indicator lines, the window is level.
Measuring Window Width
For accurate measurements, standard windows require width dimensions. When measuring width, take measurements at three points: the top, middle, and bottom of your existing window opening. Be sure to take these measurements from the inside window jambs on both sides. (Remember, the jamb is the vertical piece on each side of the window frame.)
To measure the window’s width:
- With the window closed, extend your tape measure horizontally between the left and right jambs at the top of the window and measure.
- Next, measure the middle of the window from jamb to jamb, positioning the measuring tape as close to the middle as possible.
- Finally, open the window to reveal the jambs and measure the bottom of the window, extending your tape measure from the left to the right jamb.
Make a note of the specific window location (e.g., bedroom, facing backyard) and record all three width measurements in your notebook. Highlight the smallest measurement among the three, as this represents the window opening width.
Measuring Window Height
To accurately determine the height of the window, you’ll need to take three measurements: on the left side, in the middle, and on the right side.
- Extend your tape measure vertically from the sill (where the sash rests when closed) to the head (the topmost horizontal part of the frame).
- Take three vertical measurements, starting from the left side of the window, then proceeding to the center and, finally, the right side.
Make a note of the specific window location and record each of its three height measurements in your notebook. Highlight the smallest measurement among the three, as this represents the window opening height.
Finalizing Your Measurements
Once all of the numbers are recorded, it’s time to determine your final measurements. Some professionals recommend slightly reducing measurements by rounding them down to the nearest 1/8 inch. When you’ve recorded these finalized measurements, you’re ready to proceed.
Expert Tips for Measuring Windows
Now that you’ve grasped the fundamentals of how to measure for replacement windows, here are some additional expert tips to consider:
Double-Check Everything
Before proceeding with installing replacement windows, make sure to double-check your measurements and confirm the specific type of window you require. Inaccurate measurements may result in ill-fitting replacements, leaving you with an unsightly gap in your wall until you can remedy the situation.
Take Your Time
Taking three measurements serves as a safety net; if one measurement is off, the other two will likely reveal the mistake. But don’t be misled – having a safety net doesn’t justify hasty measurements. Take your time, begin each measurement from scratch, and look closely for discrepancies.
Don’t Cut Corners
Never assume that one window’s size is identical to another in the same room – even if they appear so. As tedious as it may be, it’s always best to measure each window individually. Being cautious is preferable to discovering discrepancies on installation day.
Measure for Depth
While measuring window depth isn’t essential for installing replacement windows, there are exceptions. In cases where the existing window depth may be too narrow for a replacement, you’ll need to measure the jamb depth. To do so, open the window and measure the sill space from the front to the back of the trim, making sure there’s a minimum of 3 1/4 inches to accommodate the replacement window.
Ready to Shop for Replacement Windows?
By taking the time to prepare, focus, and double-check your work, anyone can learn how to measure for replacement windows. Still, the precision required can make some homeowners hesitant to tackle the task on their own. If you prefer professional guidance, turning to a company like MILGARD is a popular choice.
MILGARD Certified Dealers offer personalized service, visiting your home for on-site consultation. They assess your existing windows, take precise window measurements, and provide a comprehensive quote for the installation of replacement windows of superior quality. With MILGARD professionals by your side, you’ll receive expert guidance every step of the way.
If you’re ready to install replacement windows, don’t hesitate to contact us today for a complimentary, no-obligation price quote.


